Showing posts with label thanksgiving. Show all posts

Thursday, November 28, 2013

The Kids Table - Thanksgiving

The key to having a pleasant Thanksgiving meal......THE KIDS TABLE.....stock that baby up with tons of activities and crafts and maybe you will get a chance to exactly chew your food instead of inhaling it so you can grab little jimmy before he makes his grand Superman dive off you're Great Aunts Antique furniture.

Here are some of the crafts I did for my client's kid table.  They had five kids at their dinner and I wanted to make sure each one of them felt special and had fun.  I made these Turkey craft boxes as place cards, a way to keep them busy with crafts, and a place to put the crafts when they are done and take them home with them.  Here's how I did it.
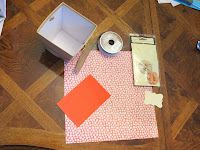
Materials 
The materials you will need need are:
1. Paper box....you can get these from dollar tree, Michaels, or hobby lobby really cheap.  I got these from Michaels for $2.99 each
2. Tags....you can either buy some premade tags at the craft stores or you can make your own.  I had some left over from another project so I used these.
3. Embellishments...it can be anything your creative mind can think of.  I'm using these paper flowers I got from Michales in the clearance section for $1.00
4. Scrapbook paper....I coordinated my paper with the paper flowers.  I tried to make sure each one was different for each child
5. Craft foam... I got mine at the dollar tree
6. Lastly, ribbon....I am using a burlap ribbon from Michaels.

Ok, let's get started.

First make a turkey head template
Trace and cut out on the craft foam


Next hot glue your ribbon around the sides
of your paper box
                   
                            Cover the overlap of ribbon with your
                  paper tag using your glue gun


Add your embellishment over top of
the tag to cover the glue marks
Fold your scrapbook paper accordion style
folding back and forth.  You can judge how
large you want the folds.

Fold in half 
Glue the two halves together

Once dry pull apart to make a fan
Turn it over and hot glue it to the back
of the paper box.  This creates the turkey feathers

Glue the turkey head that you cut
 out ahead of time to the inner part of
 the box in the front
You may need to hold it there for a little
until the glue has fully dried


Next cut out some feet
And glue them to the bottom of the
paper box so they show in the front

Print the kids names out on labels and stick them to the tags on the front of the box.  I later added a turkey face that I got off a google image search.  And you're done!  I hope you have a happy, healthy and safe Turkey Day!  Happy Crafting, Ciao for Now!
-Q-

Saturday, November 23, 2013

Gilded Glam Pumpkin Place Cards for your Fall Table!

Tablescapes are a passion of mine.  I love a beautiful table and so do our guest.  My clients understand that, and really appreciate when I add special detailing and handmade items such as these GLAMOROUS pumpkin place cards.  I made these for a wonderful client in Washington DC.  Check out this tutorial and be sure to let me know how yours turns out!   
Q-TIP:  Get your mini pumpkins at your local nursery a few days before Thanksgiving.  They will usually have them on MEGA sale (if not free) by that time because they are trying to turn over their lot to get ready for Christmas Tree and Wreaths.  I got these at $0.25 per piece....CHA CHING!  

Start with a mini pumpkin, and spray paint it with a metallic spray paint.  You can use silver, gold, or any color you really like, but I find the metallic paints look the best.  I like to use Rustoleum brands but work with whatever is available to you.  http://www.rustoleum.com/product-catalog/consumer-brands/stops-rust/metallic/  Then find some greenery, either from your own yard or a small filler bouquet from your local grocery store.  I like to use greenery that has a berry like look to them for texture.  Try to use leaves with a smooth finish to them.  It's important that you choose greenery that is TOO SCALE with your pumpkins.


Once you have sprayed your pumpkins and pulled your greenery, then print out your guest names on clear/transparent labels.  Use a font that fits the theme of your table.  Cut around the names and stick them onto the leaves. 

Once you've finished that part, then it's time to glue.  Make sure your freshly sprayed pumpkins have been completely painted and dry for at least an hour.  Spray paint usually take only 15 mins to dry, but since we are using these around food I like to just play it safe.  First glue the greenery/berries to the steam and drape them down the side of the pumpkin.  I like to glue it down the sides so the greenery doesn't look like a stray piece of hair sticking out...lol.  Then add the leaf at the bottom of the steam covering the glue marks you previously made.  


After that, add a little piece of sparkle with a bead, pearl, rhinestone (whatever your creative mind can think of).  Placing it at the bottom of the leaf covering the previous glue marks. And easy peasy lemon squeezey, you're done!  A beautiful detail to add to your festive table!!!!  Happy Crafting!


Thanks for reading.  I also have the video tutorial on youtube for you visual learners. 

Ciao for Now!  Don't forget to follow me, I have a lot of craft projects in the works that I can't wait to share with all of you.